Making a Hitty Bee Magic Carpet all comes down to one important technique: twisting the thread! We will use embroidery floss in variegated and multi-colored dyes to create lovely patterns in the finished rugs. Twisting the threads will create a tight, dense sort of cord that is perfect for gluing into teensy rugs, creating a very authentic look and feel. Let’s get started!
STEP 1 : PREPARE YOUR THREAD
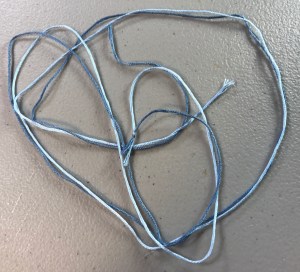
To begin, you will need a length of embroidery floss that is about 2 yards and 12 inches, or 7 feet in length, with a small loop knotted in the center. You can cut one long piece of floss, or you can cut two pieces that are each about 42 inches, and join them with a knot to make one long string, with the knot at its center.
This photo shows two different colors of floss joined together for contrast:
STEP 2: HANG YOUR THREAD
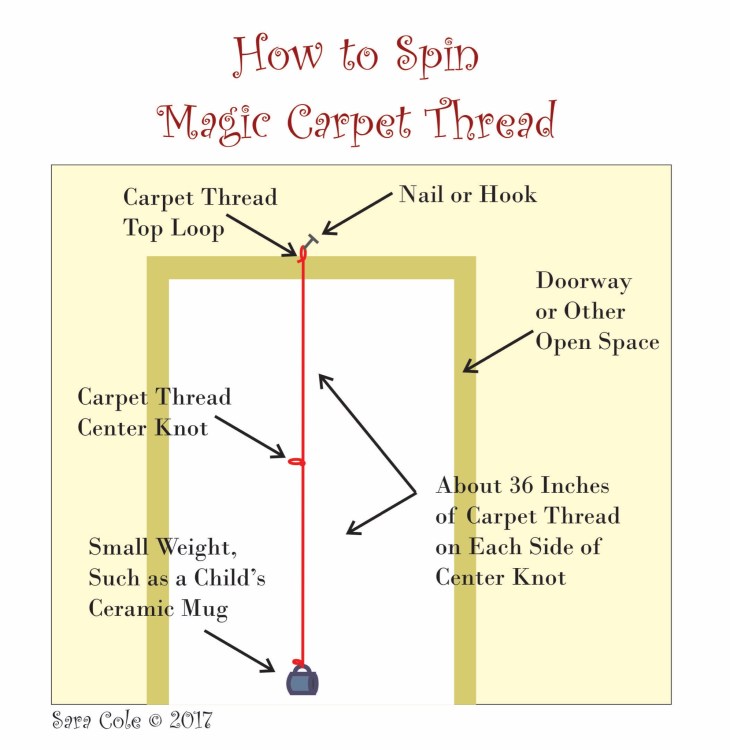
To hang your thread, you will need an open space with a nail or hook above. This could be a doorway with a small nail above the trim, or a plant hook in the ceiling with open space under it. If you were to work outside, you might be able to hang your thread from a tree branch, a swingset, a porch roof, etc.
You will also need a small weight– a child-sized ceramic mug with a handle works well, while adult mugs are mostly too heavy. A bottle of tacky glue is a good weight but the wrong shape. You may need to experiment to find what works best for you.
Tie a small loop in one end of your embroidery floss and hang it from the nail or hook. Tie the weight to the other end. Your goal is to have the weight suspended a few inches above the floor.
Here is an illlustration of this step:
STEP 3: SPIN YOUR THREAD
You must spin the weight clockwise so it twists the floss in a clockwise direction.
The 6 strands in the floss will already be twirled together in that direction, so you are increasing the tightness of the twist, not reversing it.
If you make a rug with a different type of string or floss, observe the direction in which it is spun, (if there is one), and continue in that direction, tightening the twist rather than reversing it.
The weight must be spun rapidly for a few minutes so the floss becomes very tightly twisted. It’s hard to judge the right tightness, and the rotations are too many and too rapid to count them. If you don’t twist the floss tightly enough your final carpet thread may be too loose.
Your weight will lift up quite a bit farther from the floor as the twist tightens, but if the floss starts to twist itself into tiny spirals or to twist off to one side, it has been twisted too tight.
Don’t worry if it’s not perfect the first time– embroidery floss is abundent enough to practice until you get a feel for it. Try it a few times before you use your favorite colored threads.
STEP 4: TWIST YOUR THREAD!
When your thread is spun to the right tension, it’s time to twist the two halves together, or to help them twist themselves together! It might be useful to have a second set of hands to help you with this step.
Pinch the knot in the center of the floss with one hand, and use the other hand to lift the cup up to the point where the top end is attached. While maintaining the tension, double the floss so the two halves are side-by-side.
It’s great if someone can hold the cup in place for you at this point.
Continue holding the knot in one hand and try to guide the two strands of floss through your other hand, while allowing them to coil together into one twist long. They will automatically coil around one another in the opposite direction that they’re twisted, but you want this to be very neat and even and to create one long, new ‘braid’ or ‘twist’- a tight cord made of the two colors spiraled together.
If the two sides are matched and then just released to coil together on their own, they will twist and branch off in many side directions. Interesting and pretty, but not useful for our purposes.
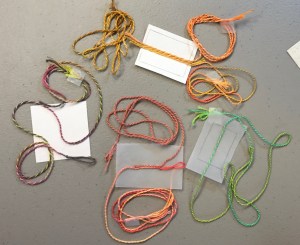
When the two halves are twisted together into your new carpet-making cord, carefully match the end that was attached to the cup to the end that was attached to the hook or nail, and knot them together. Or, (my preference) secure them with a small piece of tape.
Here is the finished braid:

Now you know Hitty Bee’s Secret Rug Cord Twisting Technique! There is no end to the woven-look dollhouse decor you can make in just minutes, now that you know how to make this twist!
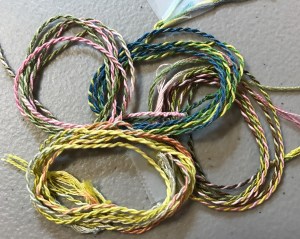
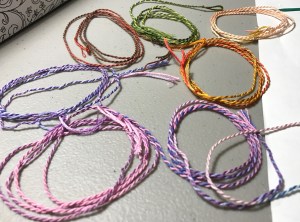
The rug-making ‘cord’ you create with this technique is firm and compact due to the tight twisting, and can be used for rugs, table mats or place mats, decorative mats to go under Hitty’s plants or a centerpiece. They can be used for chair padding, for decoration on shelves, or even a wall hanging.
You can see various colored cords I have created in the pictures below. In the next part I will show how rugs can be made!